1. Creating an account on Stripe
What is Stripe?
Stripe is the payment processing platform that Onescreener uses for the E-commerce feature. Stripe safely processes the transactions; it enables you to accept payments and send payouts to your bank account.
Once you complete the onboarding, you will be able to log in with your Stripe account in www.stripe.com to check the balance of your account, the details of your sales and your payouts information.
The Stripe onboarding process happens in two stages:
Stage 1: creating an account.
Stage 2: presenting the documentation required from Stripe to receive your money in your bank account.
Stage 1: Create an account on Stripe
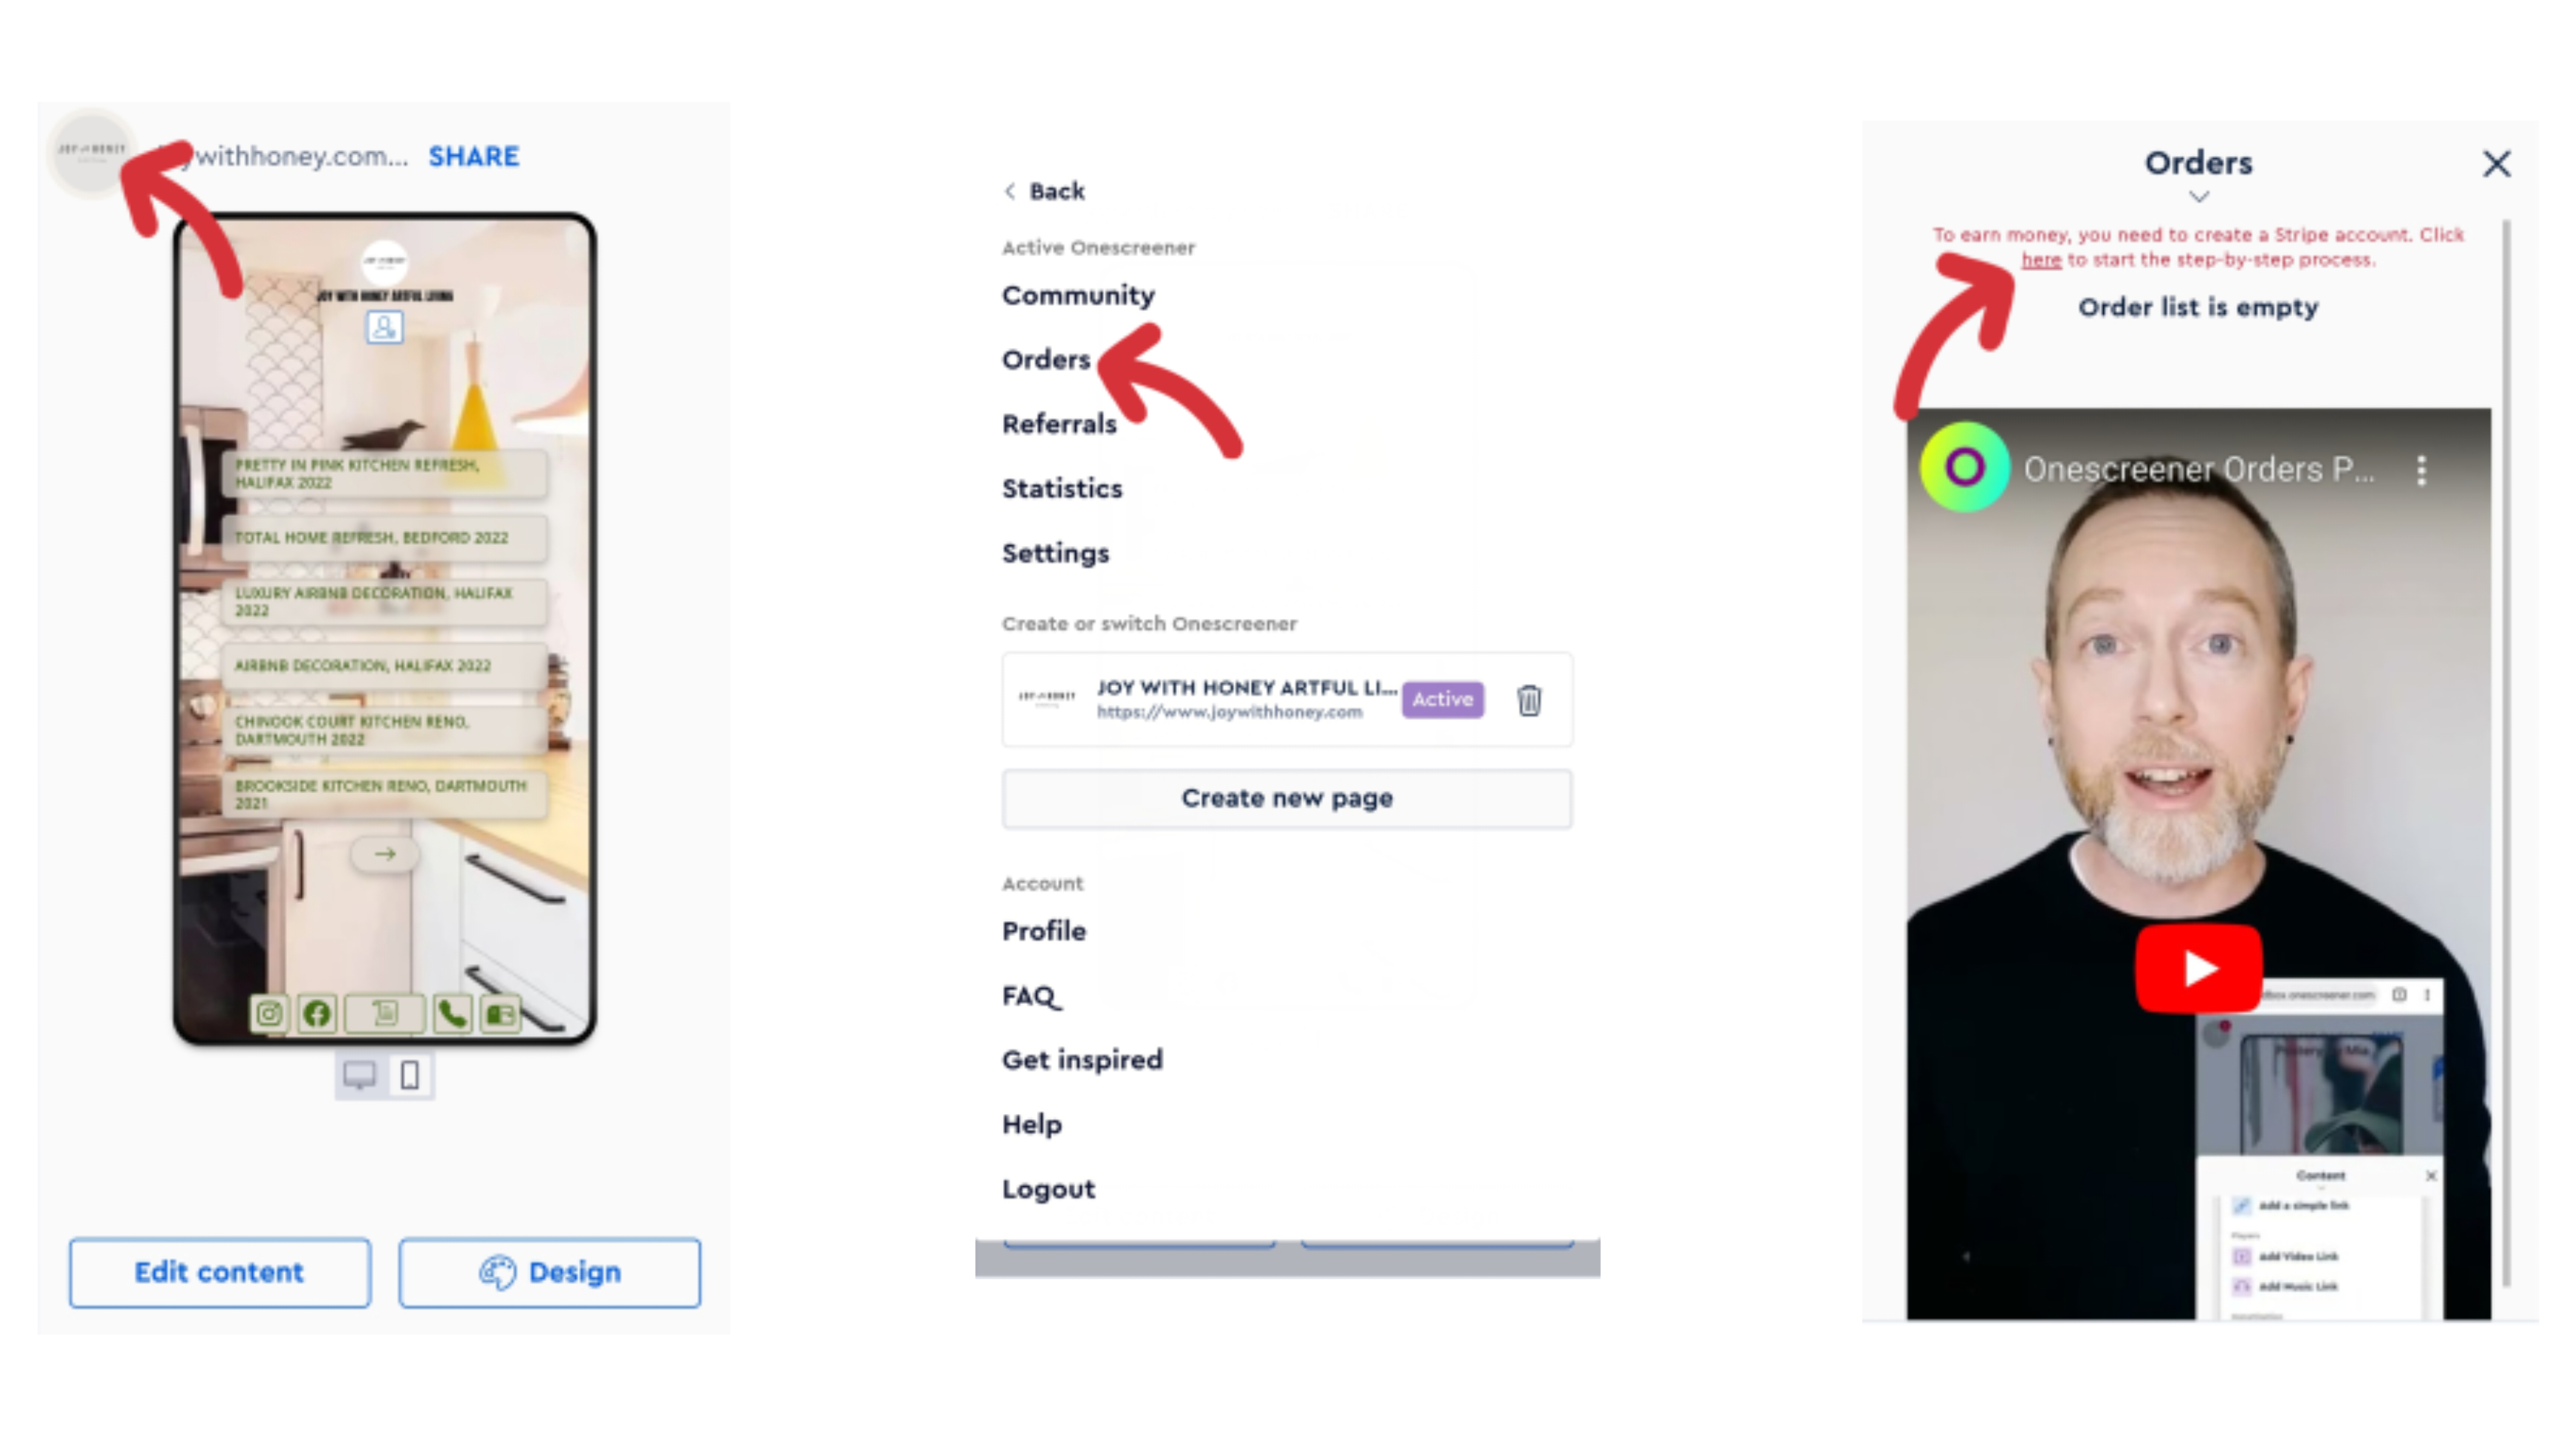
To set up the Stripe account, click on your profile image and go to "Orders". Then click at the top to get started.
Provide your email and create a password (a strong one is recommended).

Enter your phone number and wait for the verification code. Enter your verification code.

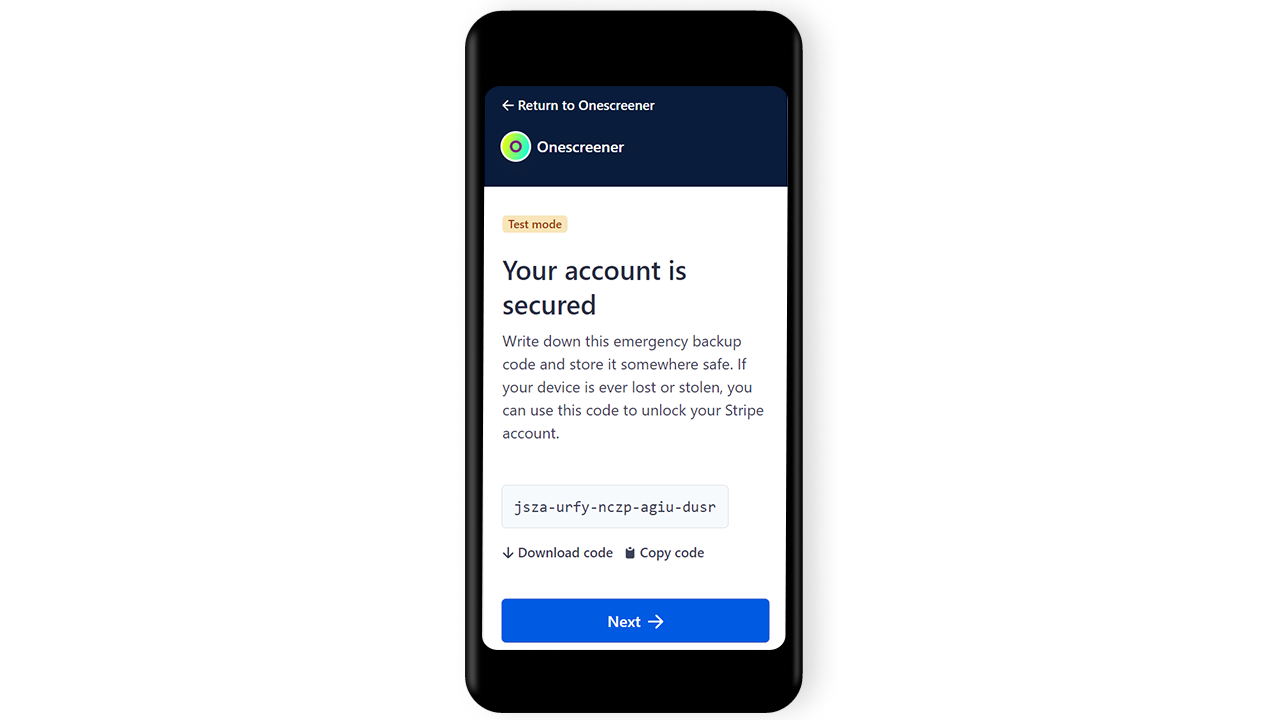
Now your account is secure. Write down the emergency backup code provided and store it somewhere safe. Stripe gives you the option to download it. If your device is ever lost or stolen, you can use this code to unlock your Stripe account.
Once your account is secure you need to complete 5 steps:
1. Tell us about your business
Provide your registered business address (address, postal code, city) and the type of business (individual, company, non-profit organization).

2. Personal details
Enter your legal name, e-mail address, date of birth and phone number.

3. Business details
Provide your Vat number (optional), pick your industry, enter your business website and product description.
Note1: When a business website is required, share the link to your Onescreener.
Note2: Under Product description you should write a sentence or two telling what products or services you provide, and when you charge your customers (such as during checkout or three days later). This helps Stripe understand your business and process your application quickly.

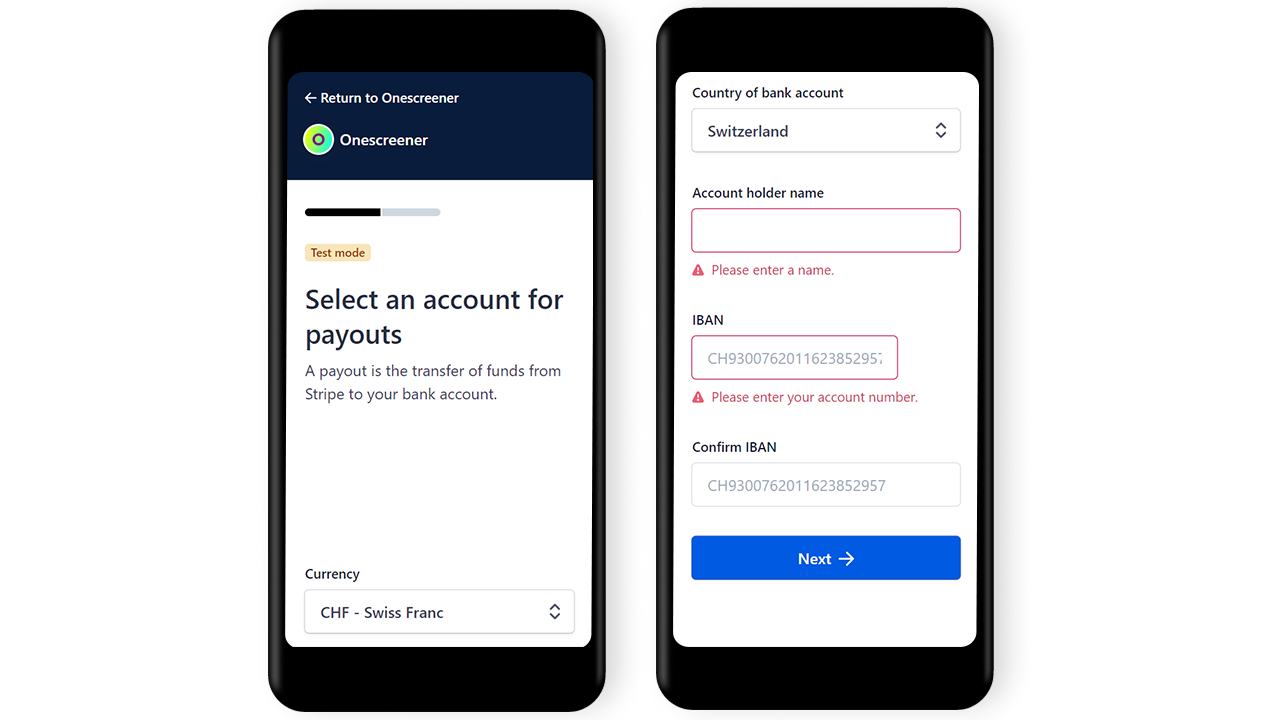
4. Select an account for payouts
Note: A payout is the transfer of funds from Stripe to your bank account.
Select your currency, enter country of bank account, account holder name, IBAN and Confirm IBAN.
Note: IBAN is the International Bank Account Number used worldwide to identify individual accounts. You can find your IBAN in the Internet Bank and on your account statement.
5. Customer support details
Note: This information helps customers recognize your business. Your support information may be visible in payment statements, invoices, and receipts.
In here you will need to provide:
- Statement descriptor: a statement descriptor is the business name a customer will see on their card statements. Choose a name that’s at least five characters and easy to recognize to avoid potential chargebacks.
- Shortener descriptor: You may provide more specific details about a charge with dynamic suffixes. When a suffix is used, it is combined with the shortened descriptor on card statements.
- Customer support phone number.

Once everything is set up you will be able to review the details and submit.
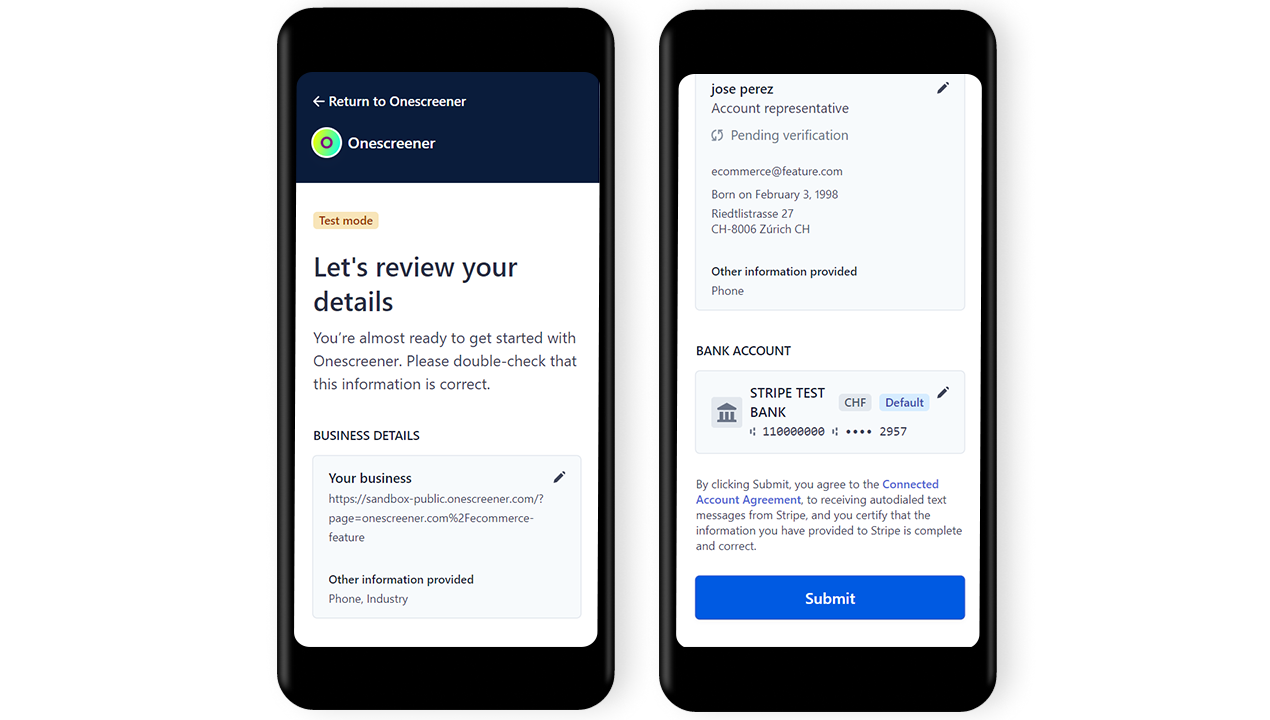
After submitting, you will see a body of text on your profile that says that Stripe is currently checking the information you provided. Once they check all the information, they will come back to you for the second stage.
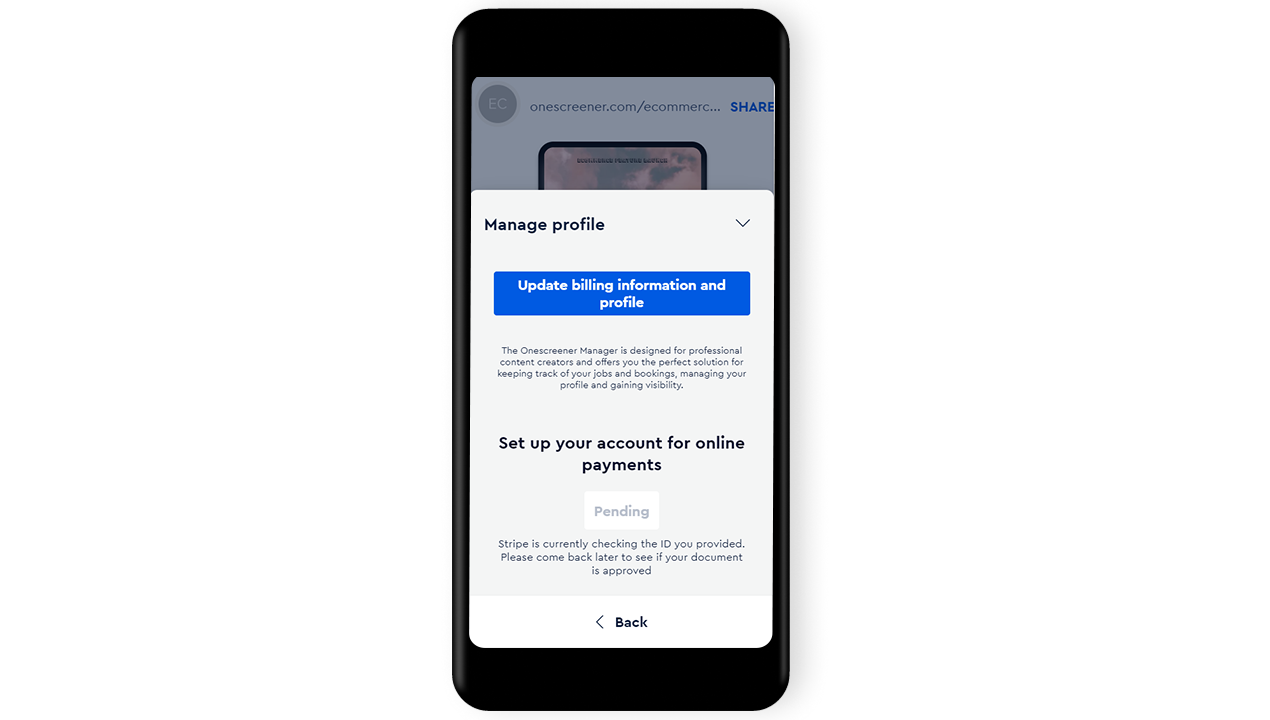
Stage 2: Present the required documentation
Once the first stage is approved by Stripe, you will be required to present documentation. Click on "Provide document".
Note: To check the status of your onboarding go to menu>profile.

Provide your Stripe email and password. Afterwards, enter your verification code (you will receive it via SMS).

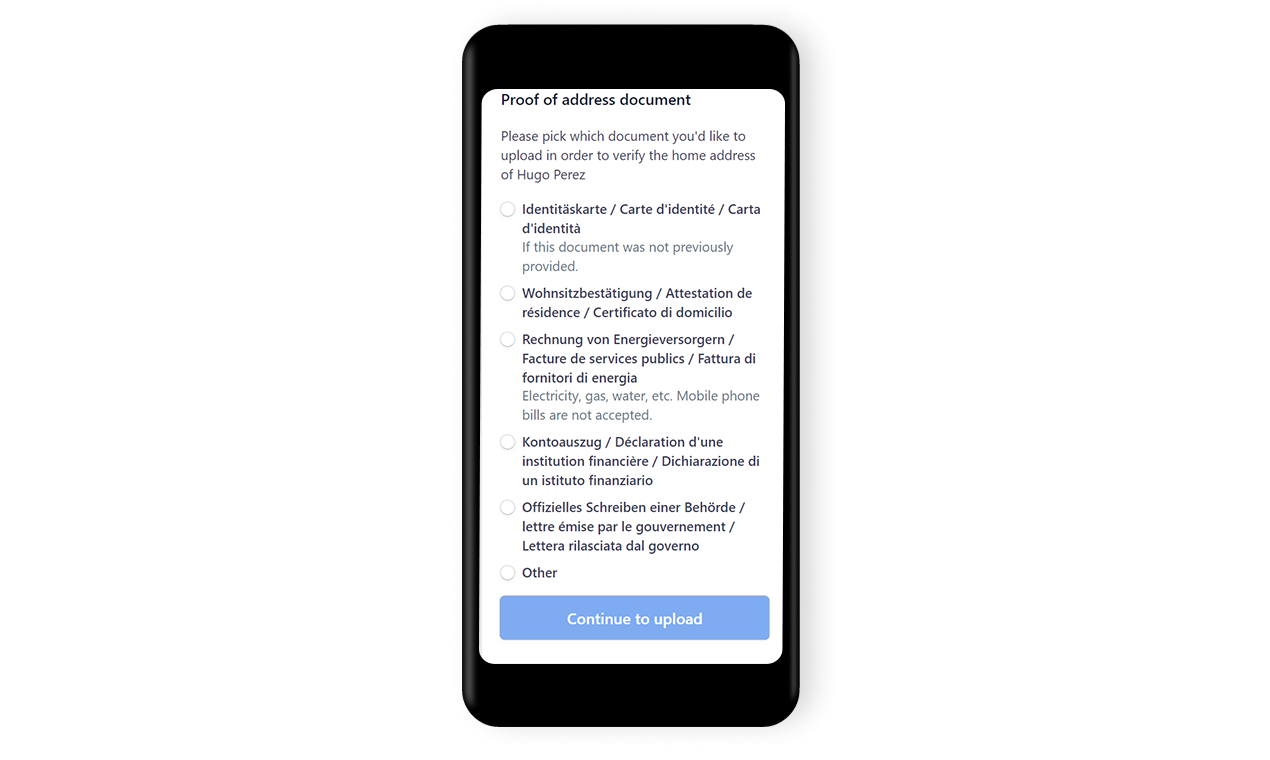
You will be required to provide a government-issued ID. You can select between driver's license, identity card or passport. Then click on "Next".

Now, you need to provide proof of address document. You can select from a wide range of documents to verify your home address. Then, click on "Continue to upload" and upload your document.
Lastly, review your details and submit.

Now your E-commerce is ready to go! It's time to set up a link to:


