NOTE: If you're looking to connect a NEW domain name to your Onescreener, please see this FAQ.
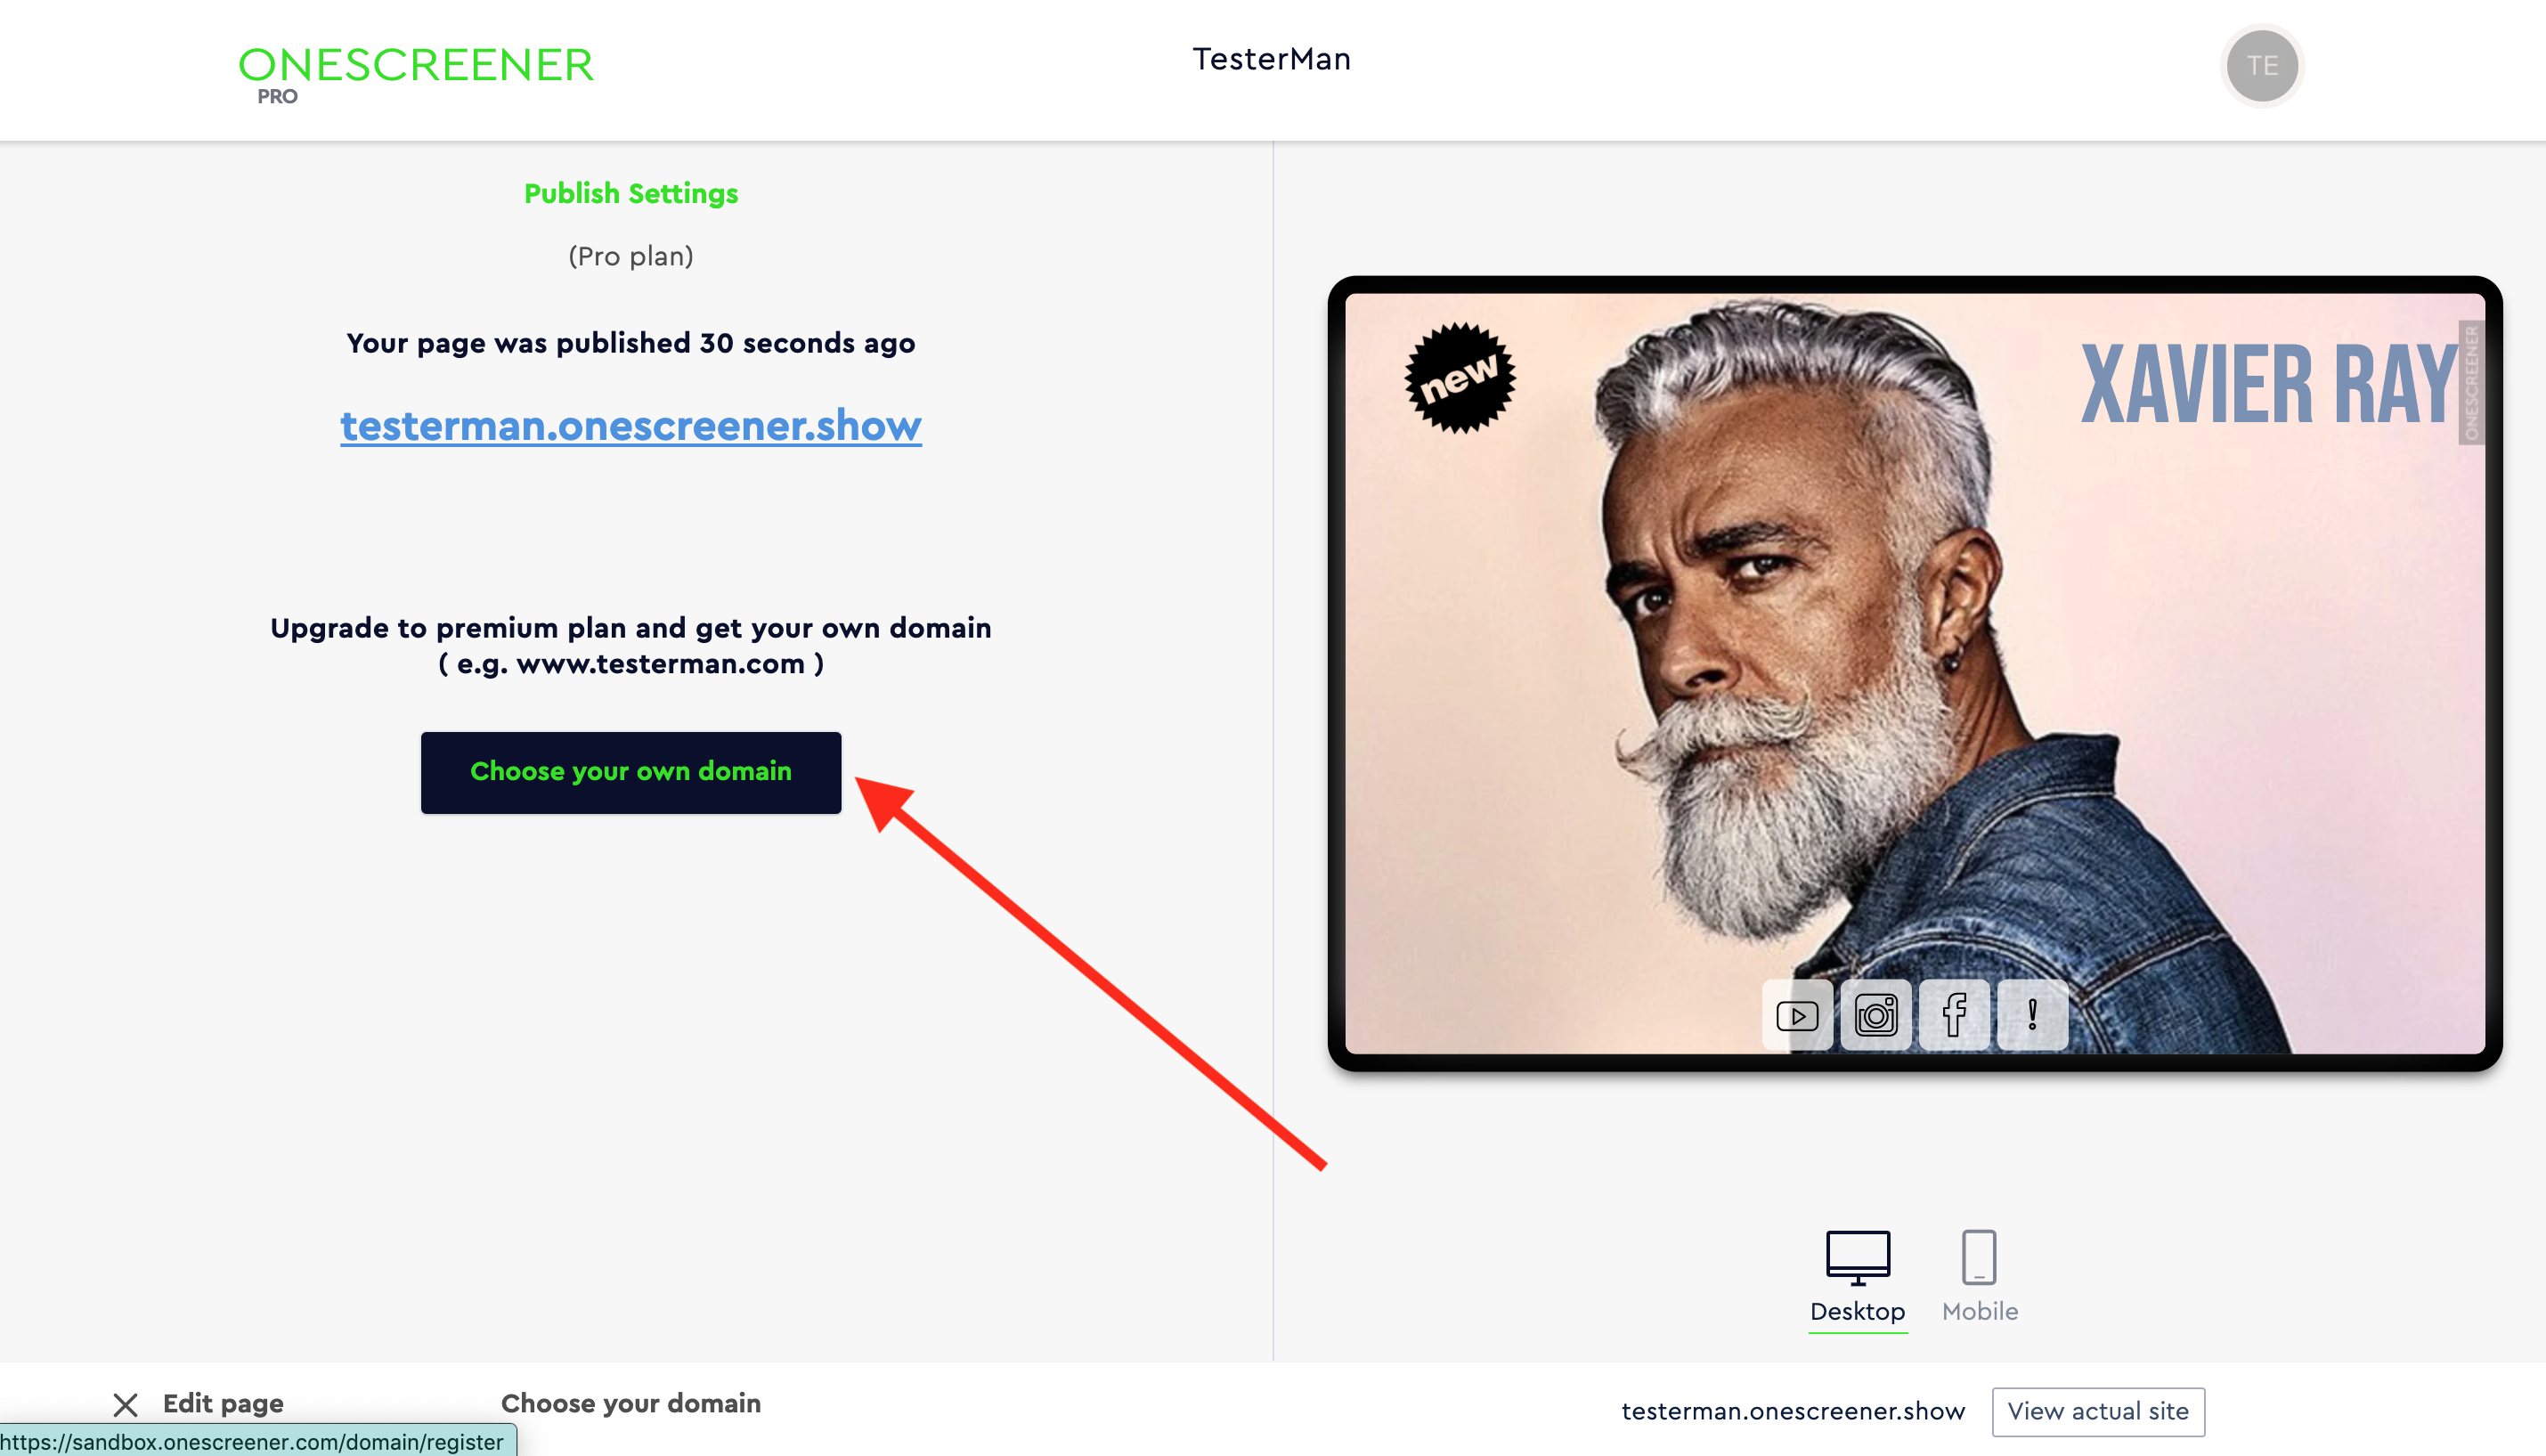
Firstly, create your Onescreener page by adding your basic information and adding your content. When it's ready, hit the Publish page button at the bottom of your screen.
Onescreener provides you with a free starter subdomain, but in this case, you want to connect your existing domain to your new site. Click on the Choose your own domain button.
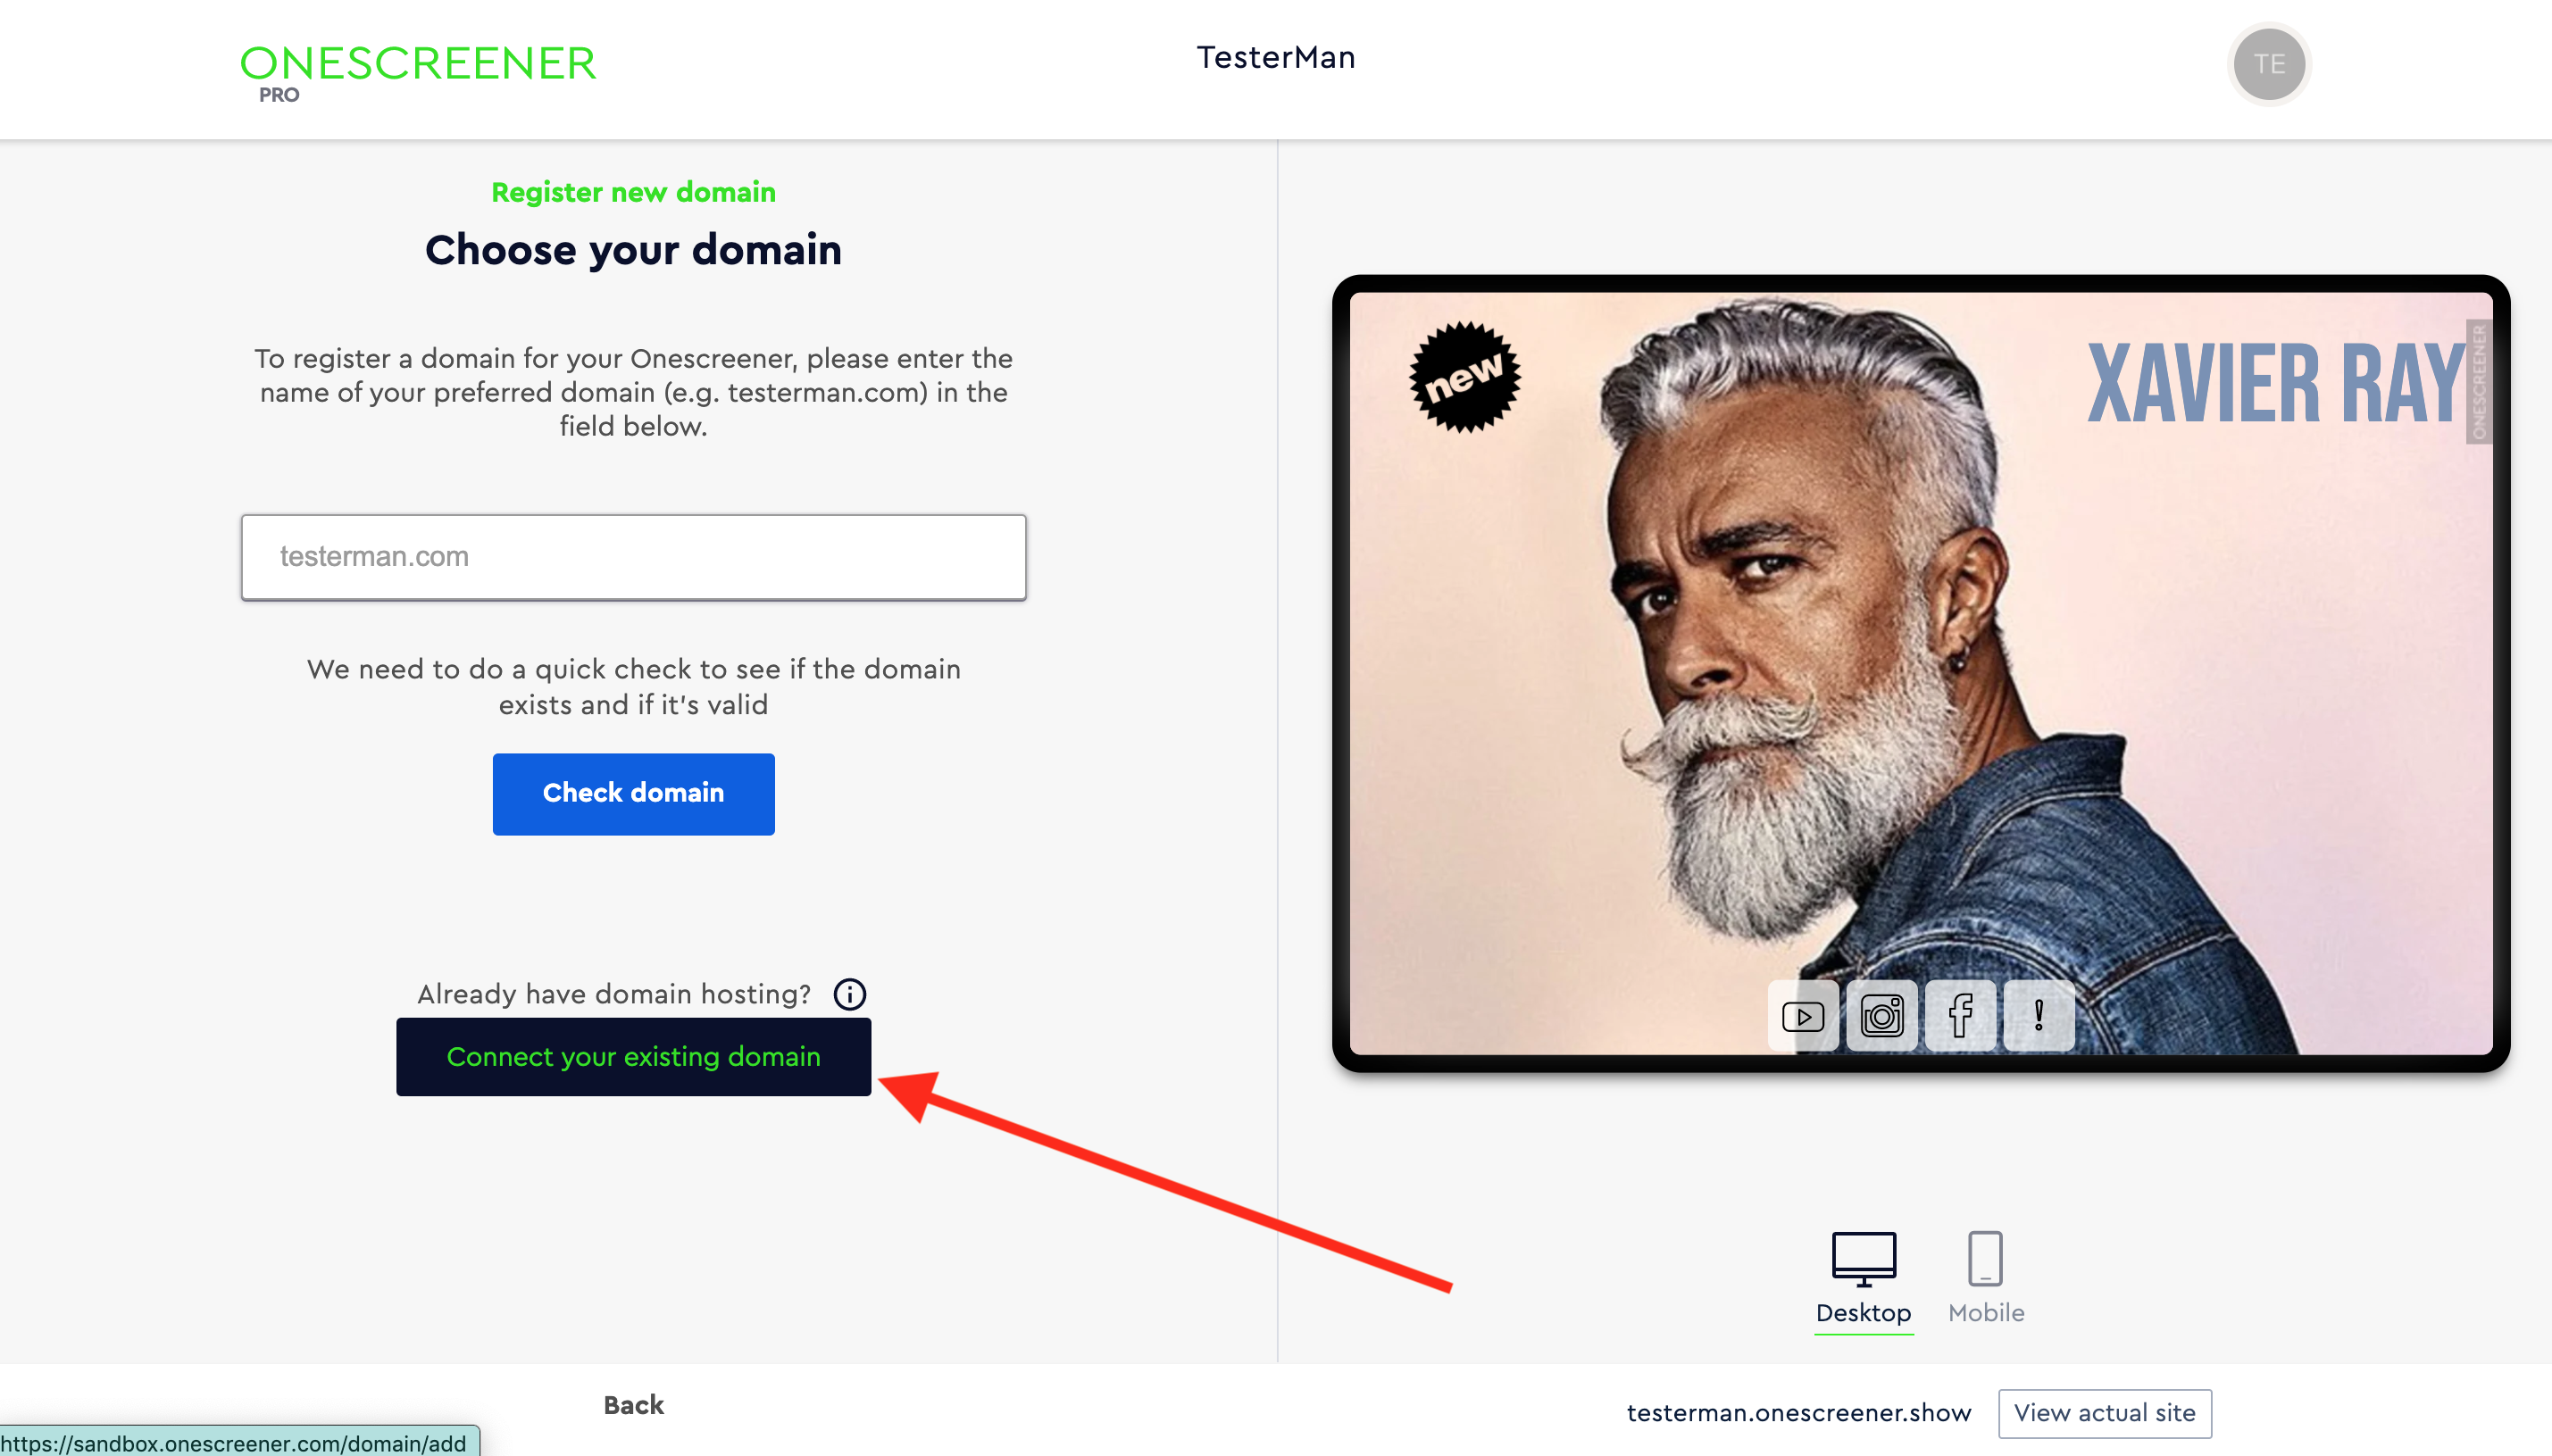
Now click on Connect your existing domain.
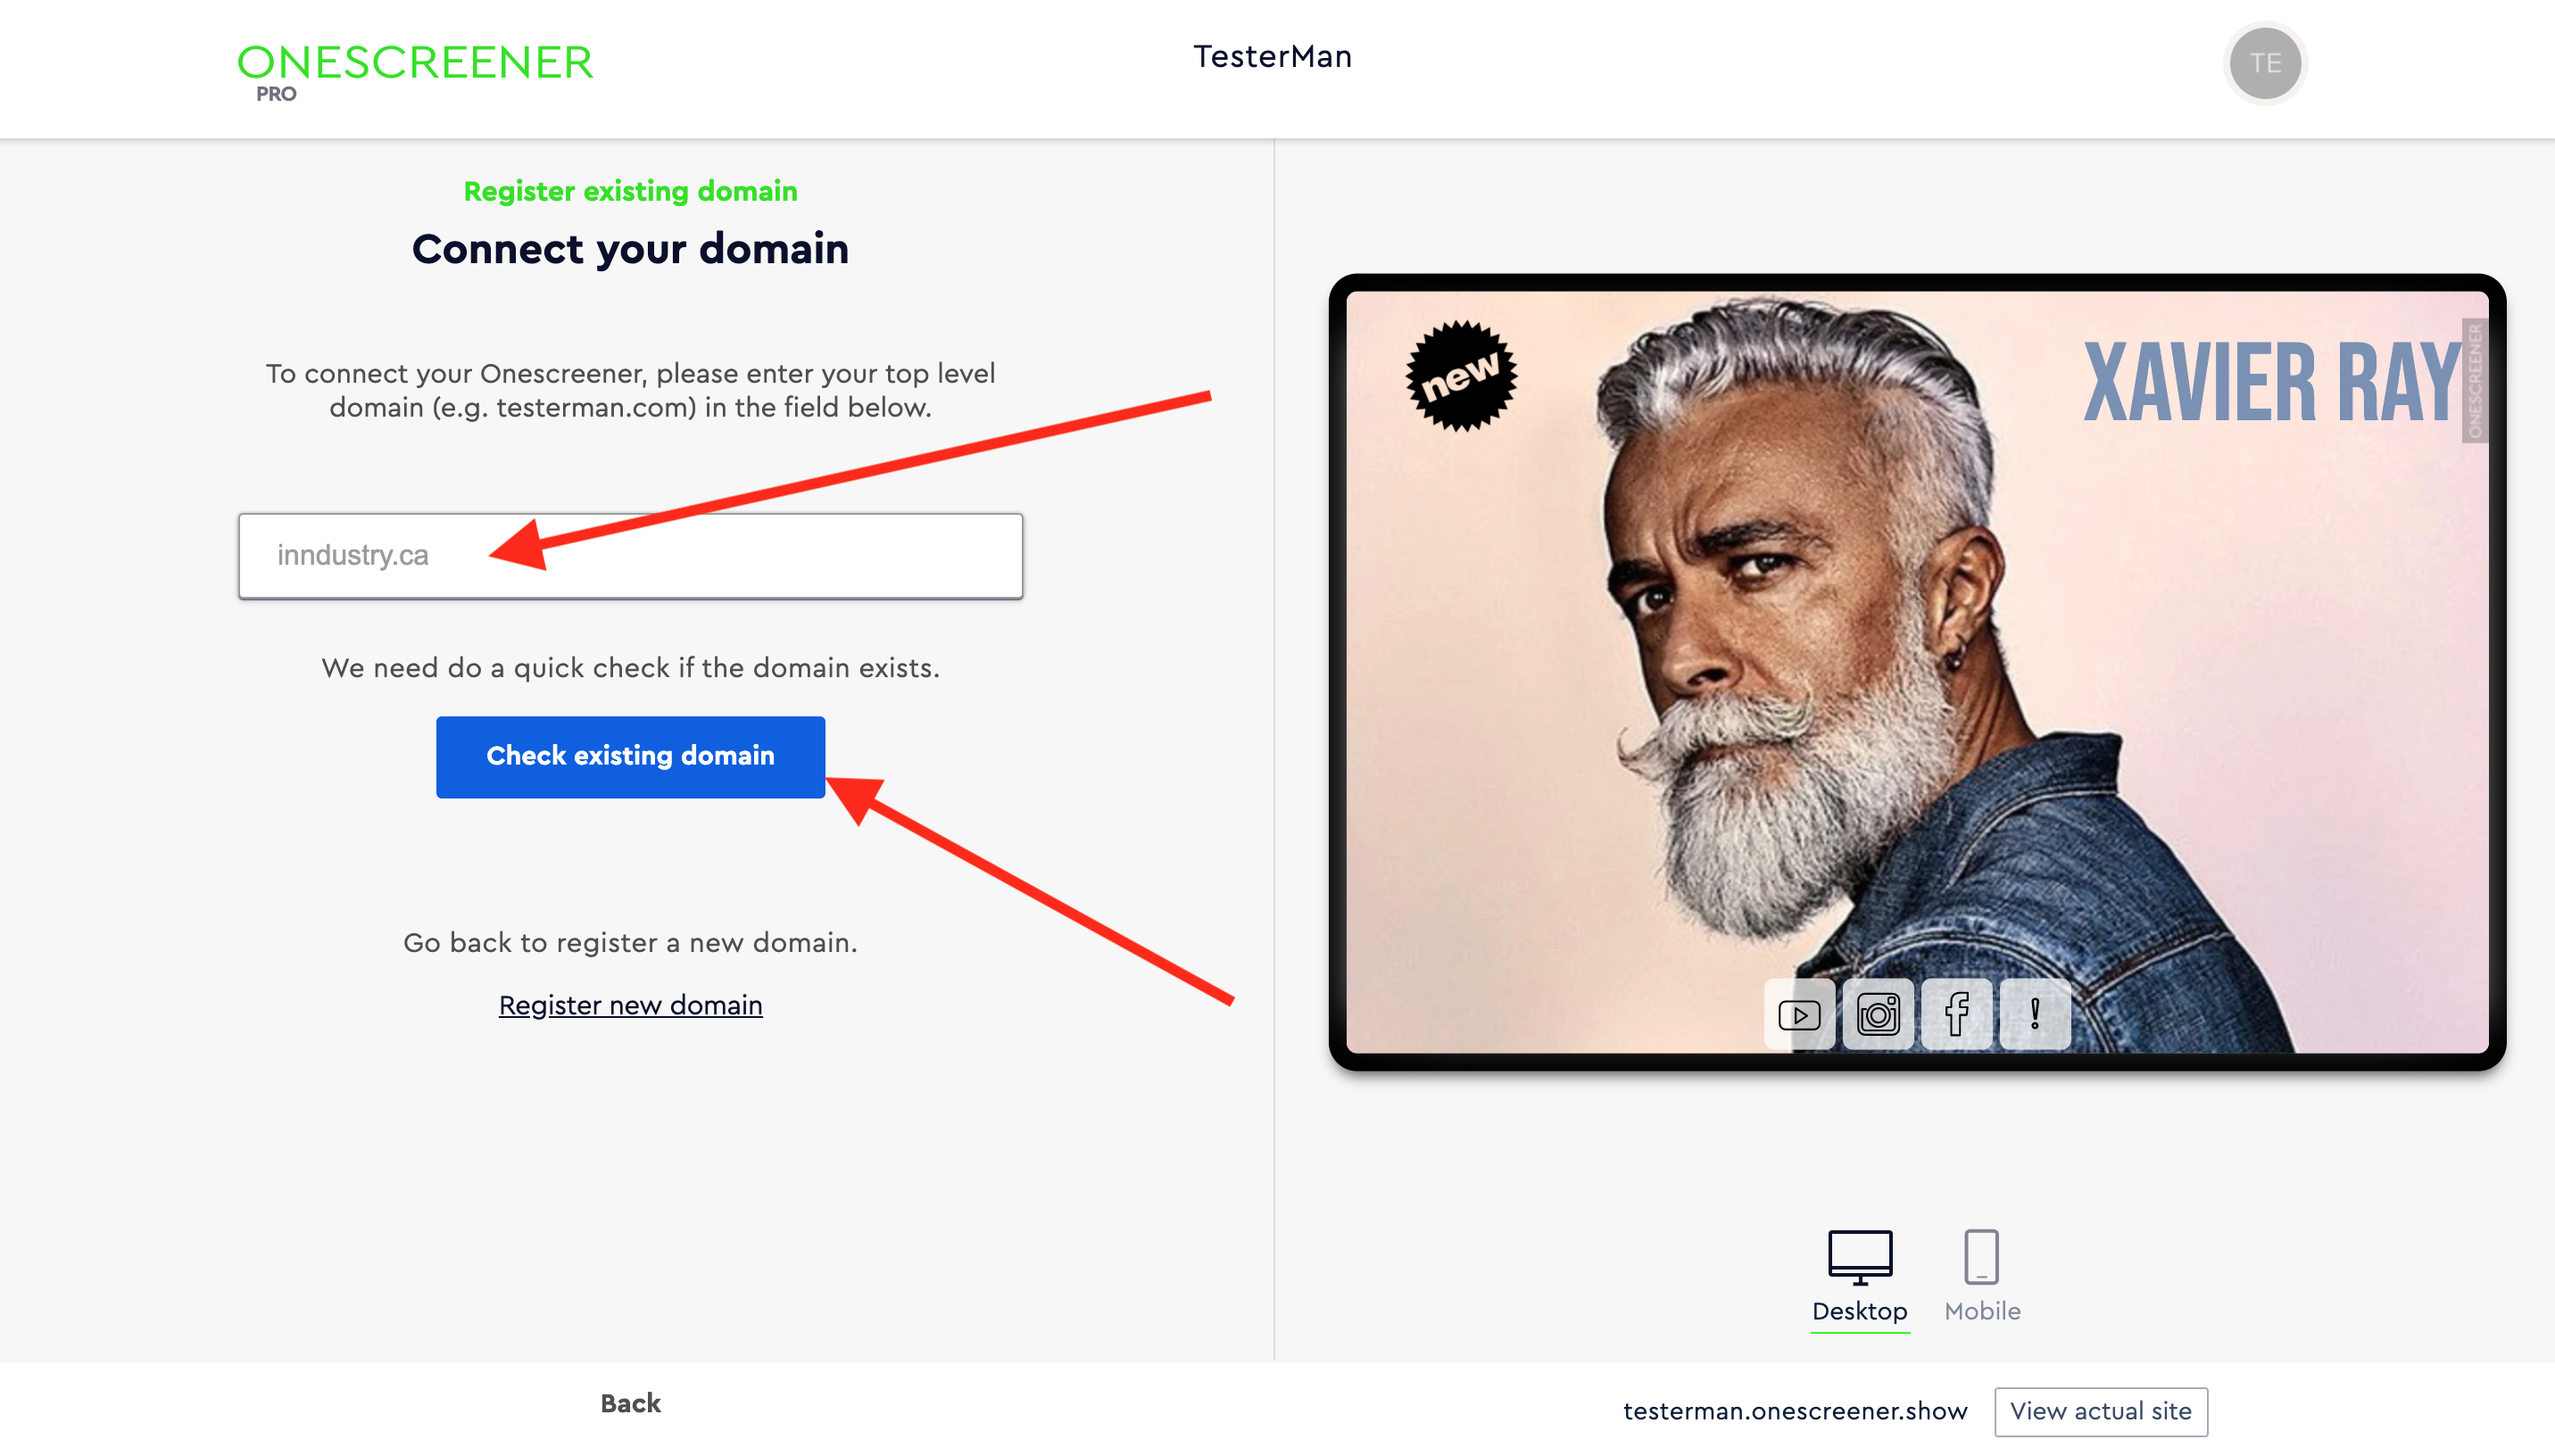
Enter your current registered URL and click on Check existing domain to verify it.
If the domain does in fact already exist, Domain found will appear at the top of the page. Now you simply have to upgrade to the Onescreener PREMIUM account and connect your domain.
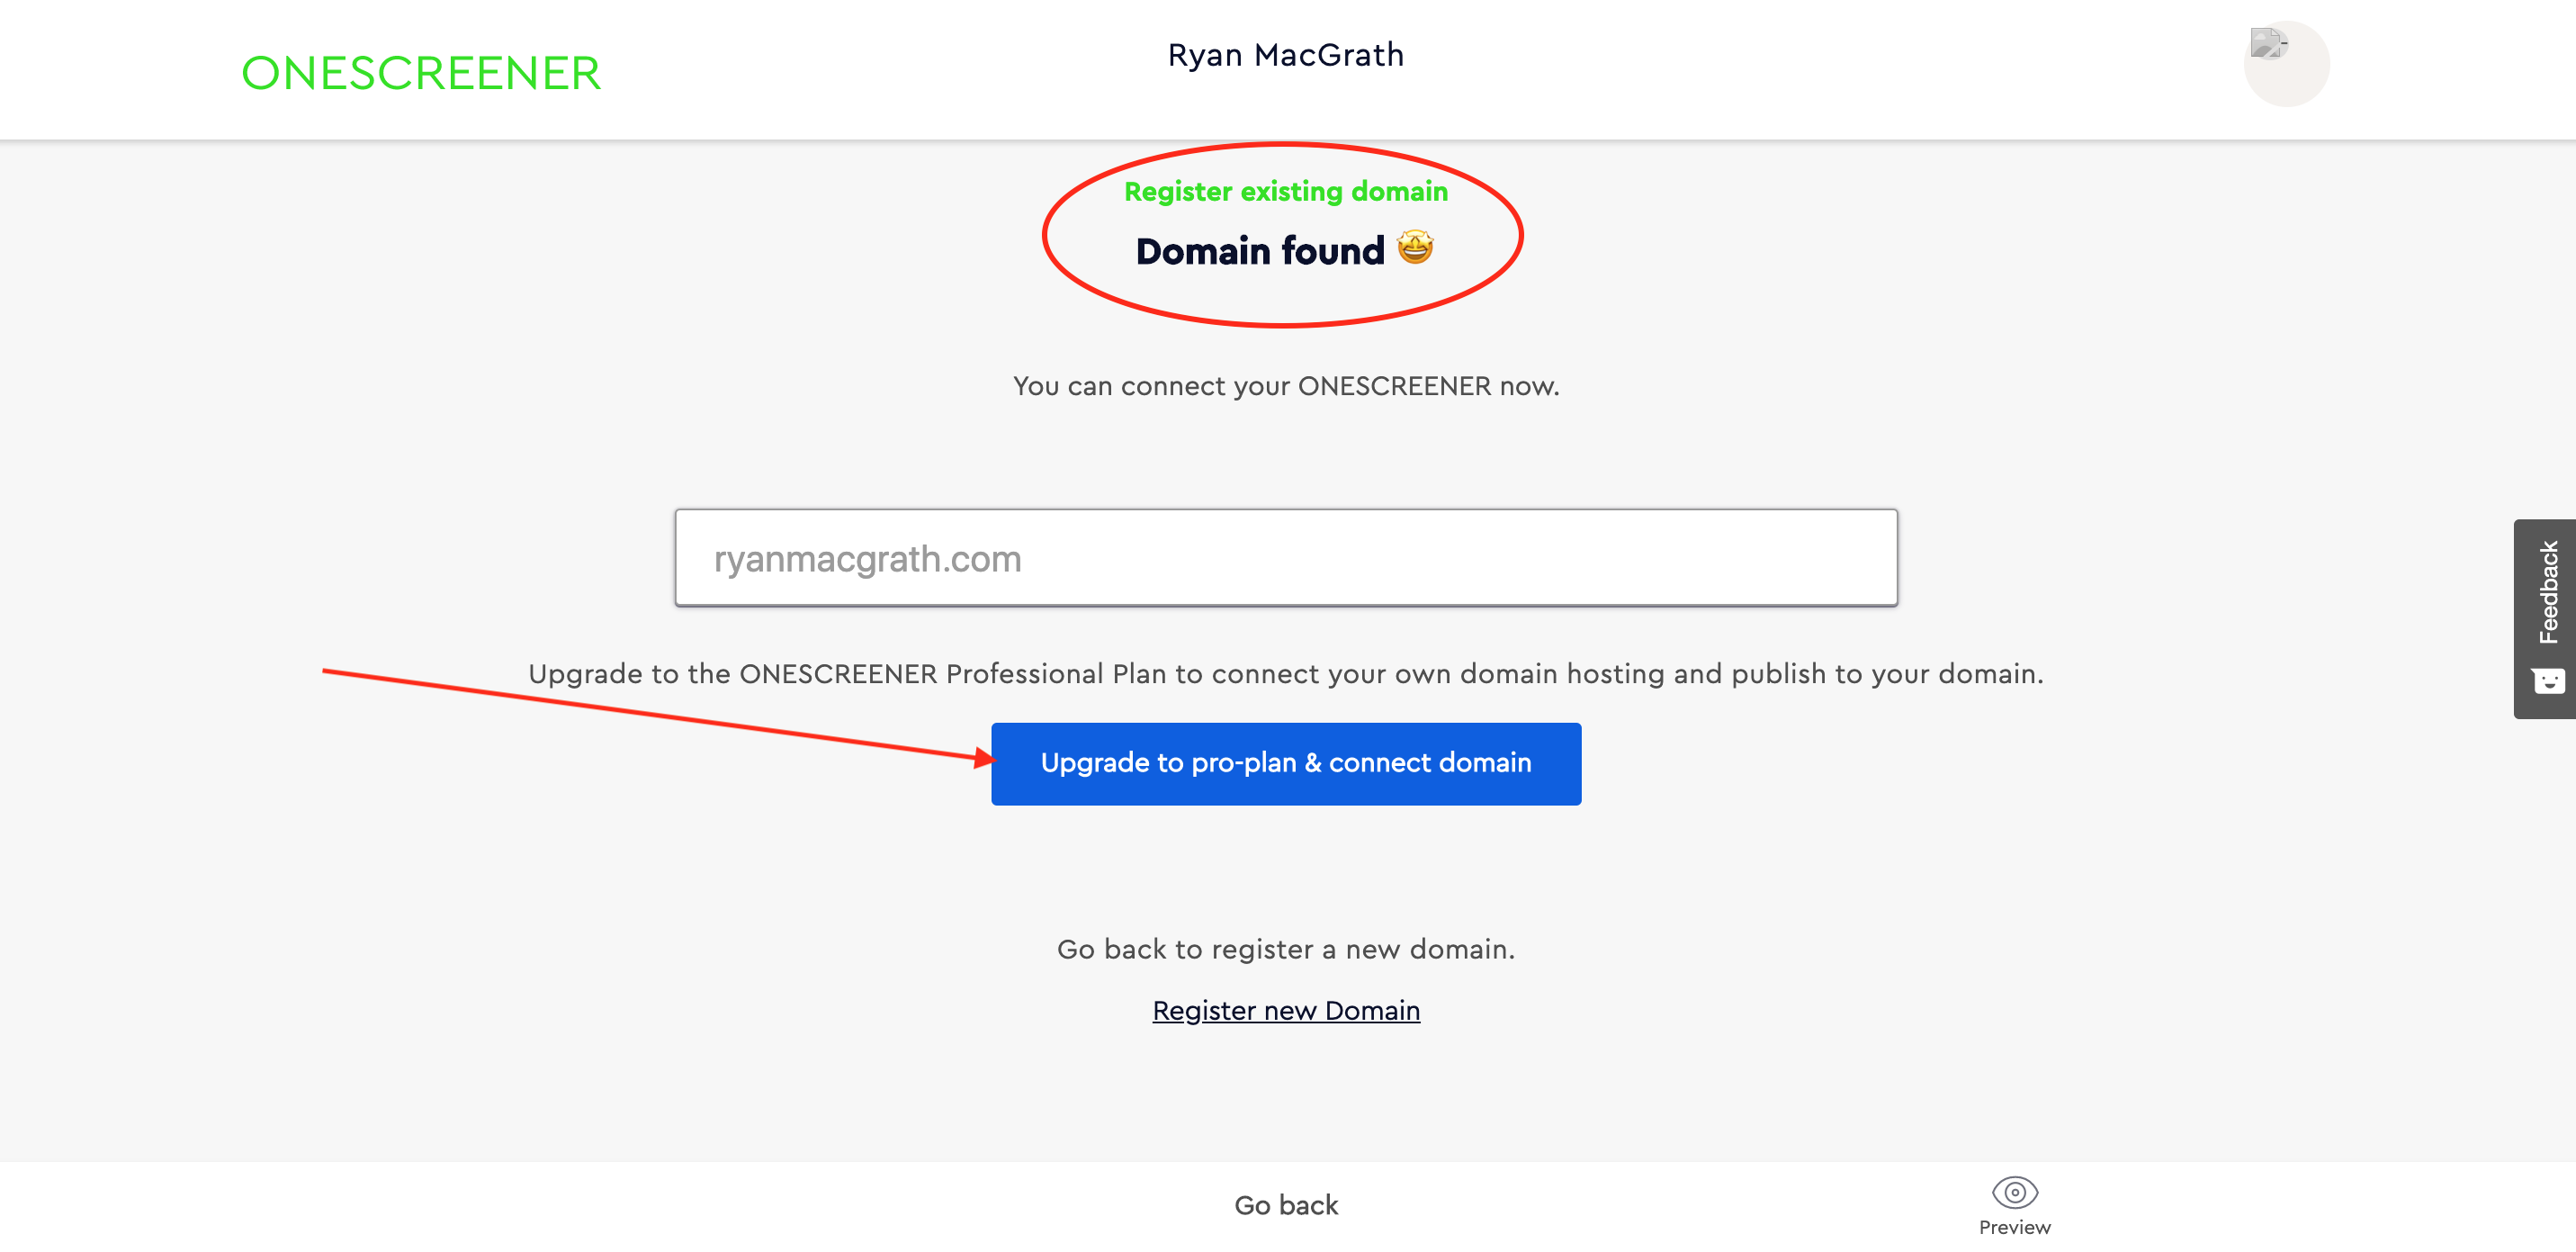
Upon entering your payment information, you will be directed to change the records in the DNS (Domain Name System) settings of your domain hosting service (external provider). When this is completed, your Onescreener will be connected to your URL and published.
NOTE: Make sure to have the correct login credentials (username and password) for your hosting service so that you can gain access to the records.


